
25 Years of Experience | Beautiful, Unique & High-Quality Flooring Products
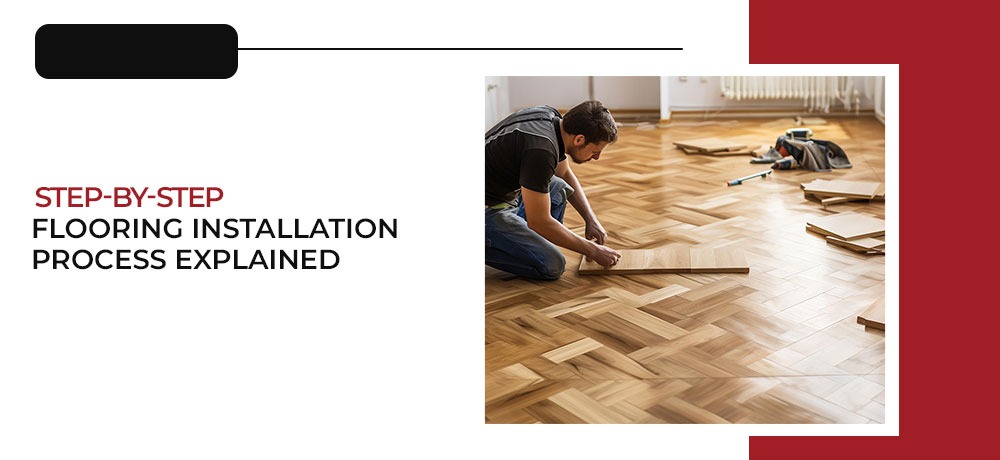
A beautifully installed floor can take your property from 0 to 10, if done properly. If you’re remodeling a single room or planning a full-scale renovation, it is important to understand how floors are installed, as it helps you make smarter decisions, avoid costly mistakes, and appreciate the craftsmanship involved. This complete flooring installation process guide will help you turn your property’s floor into a marvellous project with a few aftercare tips to keep it intact long-term.
Flooring refers to the permanent surface material that’s generally applied over a building’s subfloor to create a functional, walkable, and visually appealing finish. Beyond aesthetics, a good-quality flooring has several other benefits, such as:
Different environments demand different flooring solutions. Kitchens and bathrooms require moisture resistance, living rooms often benefit from warmth and style, while commercial spaces prioritize durability and ease of maintenance. Therefore, it’s important to know which type of flooring best suits your property.
If you’re unsure which option is right for your space, working with a professional Flooring Contractor in Stittsville can make all the difference. Experienced specialists can assess your subfloor condition, room usage, moisture levels, and design goals to recommend the most suitable material.
Common types of flooring include:
Natural wood planks bring timeless beauty and can be refinished multiple times. Oak, maple, walnut, and engineered hardwood are popular choices for such flooring.
Ceramic, porcelain, and stone tiles are known for water resistance and longevity, which makes them ideal for kitchens, bathrooms, and entryways.
A budget-friendly alternative that mimics wood or stone, laminate is easy to install and resistant to scratches.
Available in sheets, planks, or tiles, vinyl is waterproof, comfortable underfoot, and versatile for nearly any room.
Soft and insulating, carpet works well in bedrooms and lounges where comfort is a priority.
The first and most important step of the floor installation process is a thorough inspection of your floor and the relevant property areas. Such as the measurement of the room, noting down any irregular shapes, checking door clearances, and inspecting the existing subfloor for damage, moisture, or uneven areas. This planning phase determines material quantities, layout direction, transition strips, and expansion gap. So make sure you thoroughly examine your property before moving on to the next step.
Once you completely inspected your existing flooring, it’s time to remove it.
It is important that this step is carried out carefully, as you are required to remove every last bit of your old flooring. Adhesives, nails, and staples are cleared away, and debris is hauled off-site. If any moisture damage or mold is discovered, it is important to repair it before proceeding to the next step.
The subfloor is the entire foundation of your floor tile installation project. In this step, your main focus should be to patch up if there are any cracks in the subfloor. filling the low spots with leveling compound and securing the squeaky boards. In moisture-prone areas, vapor barriers or underlayment may be added.
For tile jobs, a cement backer board is often installed. For wood surfaces, particularly in the hardwood floor installation process, flatness is essential to prevent creaking or separation over time.
In this step of your flooring installation process, the complete layout of the floor will be determined. It generally includes the starting wall, plank direction, tile pattern, and how edges and corners will be handled.
If you are a crafting pro, you can DIY this whole floor tile installation process, or skilled professionals with years of experience, like Stittsville floors, can do it for you!
Now is the time things are coming together!
Depending on the type of flooring you chose, in this step, they will be installed on the floors. Below is the flooring installation process for wood, tile, and vinyl floors.
This step is all about the final touches, like the cherry on top of a cake!
In this step of the floor installation process, baseboards, quarter rounds, thresholds, and transition strips are installed to cover expansion gaps and create clean edges between rooms or different flooring types. Doors may be trimmed for clearance, and any visible nails or seams are concealed properly.
This is the step where your floor gets its polished, professional appearance.
Once installation is complete, it’s time to thoroughly clean the entire area. Dust, grout haze, and adhesive residue are removed. Installers inspect for loose boards, uneven tiles, or cosmetic flaws and correct them immediately.
As the final step of the floor installation process, the team stittsvile floors thoroughly guides you through maintenance instructions and warranty details, which brings the entire flooring installation process to a satisfying close.
Proper care keeps your floor looking new and extends its lifespan.
Flooring should be installed on a clean, dry, level subfloor after proper inspection and preparation. Hiring a professional kanata flooring contractor can help ensure that each stage of the process is handled correctly and according to industry standards. The general approach includes removing old flooring, fixing uneven areas, adding underlayment or moisture barriers if needed, planning the layout, installing the chosen material according to manufacturer guidelines, finishing edges with trim, and performing a final inspection and cleanup. Proper installation ensures durability, safety, and a polished final appearance.
The “rule of 3” in flooring usually refers to staggering plank seams so that no two end joints line up within three rows. This creates a stronger structure and a more natural appearance. Many installers also follow a minimum 6–8 inch offset between joints, depending on product specifications.
The first step is always evaluating and preparing the subfloor. This includes checking for moisture, repairing damage, leveling uneven spots, and ensuring the surface is stable before any material is installed.
Vinyl flooring installation typically follows these steps:
Hardwood floors are usually installed through this sequence:
Yes. Most hardwood floors require underlayment or a moisture barrier, especially over concrete slabs. These layers help control humidity, reduce noise, and improve stability. Some engineered hardwood products include built-in underlayment.
For floating or nailed hardwood floors, light foot traffic is often allowed within 24 hours. For glued-down floors or newly finished site-finished hardwood, it may take 48–72 hours or longer before walking on them or placing furniture, depending on adhesive or finish curing times.
Common mistakes include:
Tile installation usually involves:
The 3/4/5 rule is a method used to create perfect right angles when laying tile. Measure three feet along one wall, four feet along the perpendicular wall, and the diagonal between those points should measure five feet if the corner is square. This helps ensure straight tile lines and symmetrical layouts.
Before tiling, you should install a cement backer board, uncoupling membrane, or mortar bed, depending on the subfloor. These provide stability, prevent cracks from transferring, and improve tile adhesion. On concrete slabs, moisture barriers may also be necessary.
Common tiling mistakes include:
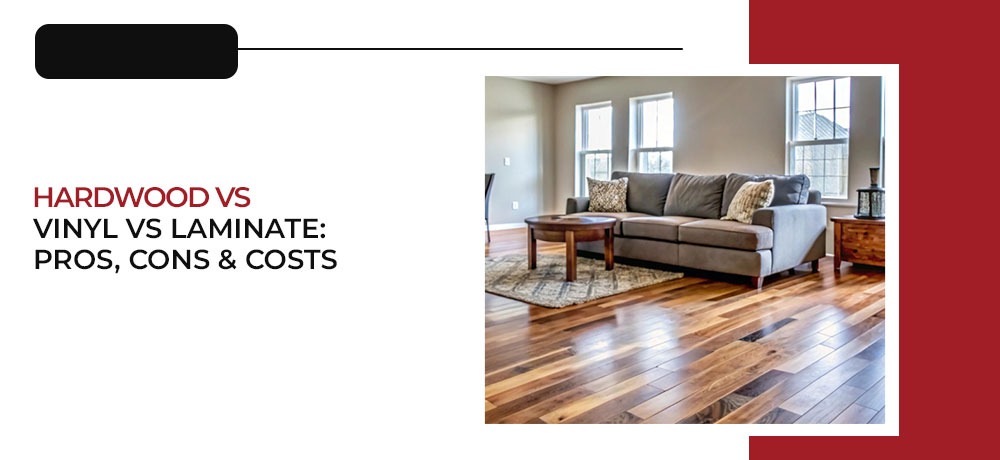
One of the most important decisions you will make about your home design is its flooring. It not only enhances your home’s aesthetic value but also reflects the floor’s durability, maintenance needs, and long-term value. The three most popular options are laminate vs vinyl vs hardwood flooring:
Each of these options has its own strengths and weaknesses, so a clear understanding of each option is required for making an informed decision. This guide provides a detailed overview of hardwood vs vinyl vs laminate flooring options with their pros, cons, and how much they cost, so let’s get into the details!
Hardwood flooring is made from solid wood planks milled from hardwood species like oak, maple, cherry, or walnut. It’s natural, timeless, and has been a staple of quality home design for generations. For the past 25 years, we’ve been flooring the beautiful homes of our clients with hardwood, and it instantly becomes everyone’s favorite!
You can find more about it here: https://stittsvillefloors.com/
Vinyl flooring is a synthetic product made from PVC plastics engineered to mimic wood, stone, or tile. It comes in sheet vinyl, luxury vinyl plank (LVP), or luxury vinyl tile (LVT) formats.
Laminate flooring is an engineered product made of multiple layers of synthetic material fused together. A printed photographic layer gives it the look of hardwood or tile, and a protective top layer resists wear.
Hardwood vs vinyl vs laminate, which is the best one?
There isn’t a one-size-fits-all answer, it depends on your priorities:
If you’re willing to invest in beauty and longevity and care about resale value, hardwood wins, but it comes at a premium. If you need practical, worry-free flooring for kitchens, bathrooms, or rental homes, vinyl is often the best choice. If cost and DIY installation are your priorities, laminate hits the sweet spot.
For expert installation and guidance on all flooring types in Ottawa, check out our Ottawa flooring contractor services.
There’s no universal “best”; it depends on your needs:
So the best choice varies by priorities: style and value (hardwood), moisture and ease (vinyl), or cost and install-ease (laminate).
The Rule of 3 is a design guideline suggesting you should use no more than three different types of flooring in a home. It helps create visual harmony and flow between spaces, for example, hardwood in living areas, tile in bathrooms, and carpet in bedrooms.
The healthiest flooring options typically:
Some of the healthiest choices include:
Hard surfaces are often better for allergy sufferers than carpet because they don’t hold dust or pet dander.
Common disadvantages include:
No. Hardwood is typically more expensive than laminate in both materials and installation. Laminate is one of the most budget-friendly flooring options.
It’s a design rule that recommends keeping no more than three different floor types in a home to maintain a cohesive and balanced look throughout the space.
To recap:
The right choice depends on your home, lifestyle, and where the flooring will be installed.
Hardwood is more expensive than vinyl. Hardwood flooring generally costs more in both material and professional installation, while vinyl remains one of the most affordable options.
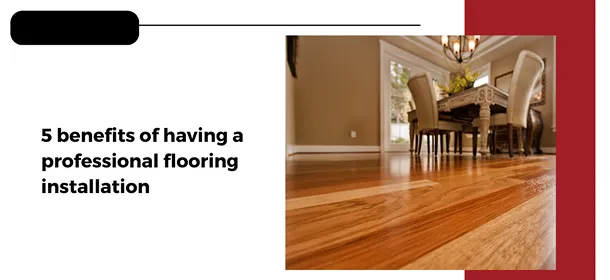
When it comes to enhancing the beauty and functionality of your home, the quality of your flooring installation plays a pivotal role. For homeowners in Kanata, Centrepointe, Nepean, Carleton Place, Stittsville, Ottawa, and surrounding areas, choosing the right professionals for flooring installation is not just a matter of aesthetics but also of long-term satisfaction and durability. Stittsville Flooring Inc., a family-owned business specializing in tiles and mosaics, understands the intricacies involved in selecting and installing the perfect flooring that reflects unique tastes while ensuring lasting quality.
One of the primary concerns for customers when it comes to flooring installation is the assurance of precision and high-quality finish. A professional installation by experts like those at Stittsville Flooring Inc. guarantees that each tile or piece of flooring is perfectly aligned and securely placed. This meticulous attention to detail prevents future issues such as uneven surfaces, gaps, or potential damages, which are common in DIY or poorly executed installations.
Professional flooring installers are equipped with the right tools and technologies that are typically not available to the average homeowner. These specialized tools ensure that the flooring material is cut with precision, laid evenly, and bonded securely to the subfloor. Furthermore, professionals are up-to-date with the latest techniques and materials in the industry, which enhances the overall quality and durability of the installation.
Investing in professional flooring installation enhances the immediate appearance of your space and contributes to the longevity of the material used. Professionals understand the science behind each type of flooring material, including its reaction to various environmental factors and how to mitigate potential issues that could shorten its lifespan.
Each flooring material, whether it’s hardwood, tile, or mosaic, requires specific handling and installation techniques to preserve its quality and aesthetics. Professional installers from Stittsville Flooring Inc. are trained to handle these materials correctly, ensuring that they are not damaged during the installation process. This careful handling is crucial for maintaining the integrity and longevity of the flooring.
The overall look of your floor can define the ambiance of a room. Professional flooring installation ensures that the finish is seamless and visually appealing. The expertise of seasoned installers allows them to lay down flooring in patterns that complement the dimensions and natural lighting of a room, thereby enhancing its overall aesthetic appeal.
Stittsville Flooring Inc. prides itself on offering a variety of unique flooring products from around the world, giving homeowners the opportunity to customize their spaces. Professional installers can advise on the best materials and designs that align with your vision, ensuring that the final product is as beautiful as it is unique.
Professional flooring installation is not only about achieving a flawless finish but also about efficiency and cost-effectiveness. Homeowners often underestimate the time and expenses involved in a DIY flooring project. From purchasing the right tools and materials to spending valuable hours learning and executing the task, the DIY route can quickly become overwhelming and costly. By hiring professionals like Stittsville Flooring Inc., you can save both time and money. Their experience allows them to complete the job faster and more efficiently, avoiding costly mistakes and unnecessary material wastage.
Stittsville Flooring Inc. follows a streamlined process that begins with a consultation to understand your needs and preferences, followed by an efficient installation schedule. This organized approach minimizes disruptions to your daily routine and ensures that your flooring project is completed on time and within budget.
The installation of flooring involves various tools and techniques that could pose safety risks, particularly for those who are not trained in flooring installation. Professional installers are well-versed in the safety protocols necessary to handle heavy materials, sharp tools, and other hazardous aspects of flooring installation. By entrusting this task to the experts at Stittsville Flooring Inc., you ensure that your home improvement project is carried out safely without any compromise to your or your family’s well-being.
Stittsville Flooring Inc. adheres to all local building codes and industry standards, which is crucial for ensuring that your flooring installation is not only beautiful but also structurally sound and compliant with all safety regulations. This adherence protects you from future legal and structural issues that could arise from non-compliant installations.
One significant advantage of professional flooring installation is the added value it brings to your property. Quality flooring that is expertly installed can significantly increase the market value of your home. This is particularly important for those considering selling their home in the future. Prospective buyers are often willing to pay more for homes with durable and aesthetically pleasing floors, making it a wise investment.
While the initial cost of professional installation might be higher than a DIY approach, the long-term savings are undeniable. Professionally installed floors last longer and are less likely to need repairs or replacements due to improper installation. This reduces the overall maintenance cost over the lifetime of your flooring.
Choosing Stittsville Flooring Inc. means you receive personalized support throughout the entire process of your flooring project. From the initial consultation to the final inspection, you benefit from the expertise and advice of professionals who are committed to your satisfaction.
At Stittsville Flooring Inc., we take the time to understand your style preferences, functional needs, and budget. This tailored approach ensures that you receive flooring solutions that perfectly match your expectations and lifestyle.
Our team manages all aspects of your flooring installation project, from delivery and installation to cleanup and final touches. This turnkey solution allows you to enjoy a hassle-free experience without the need to coordinate multiple contractors or worry about project timelines.
At Stittsville Flooring Inc., your satisfaction is our top priority. We strive to exceed your expectations with our craftsmanship, customer service, and meticulous attention to detail. Our goal is to ensure that every aspect of your new flooring is perfect and that you are completely satisfied with the outcome.
Choosing Stittsville Flooring Inc. for your flooring needs in Ottawa means opting for a stress-free process with guaranteed quality and durability. Our dedicated team of professionals is equipped to handle any project, ensuring that your new floors are not only beautiful but also a lasting investment in your home.
If you’re ready to transform your home with high-quality, professionally installed flooring, contact us today at admin@stittsvillefloors.com. Let us help you achieve the home of your dreams with stunning floors that reflect your style and enhance your living space.
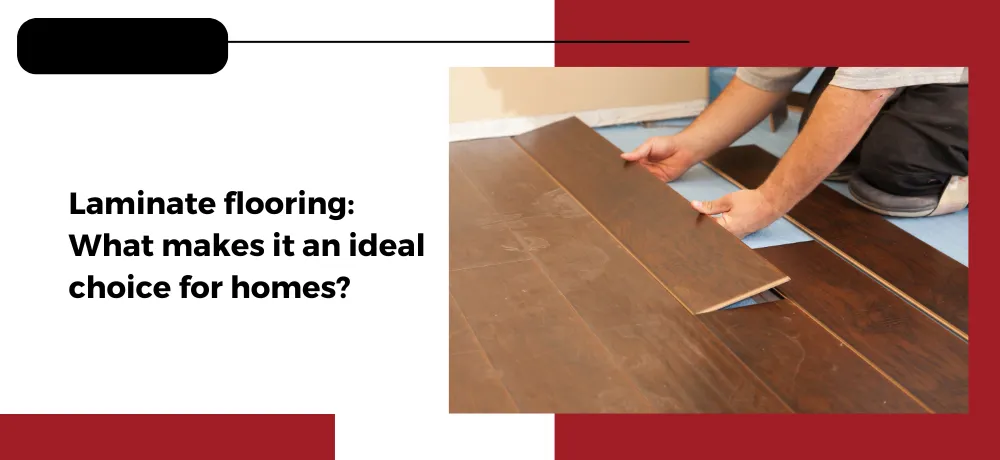
When it comes to choosing flooring for a home, homeowners are often faced with a myriad of options, each with its own set of benefits and drawbacks. Among these, laminate flooring stands out as a particularly attractive choice due to its durability, ease of installation, and aesthetic versatility. This article explores why laminate flooring is becoming increasingly popular among homeowners in Kanata, Centrepointe, Nepean, Carleton Place, Stittsville, Ottawa, and surrounding areas and how Stittsville Flooring Inc. can help you make the right flooring decision for your home.
Laminate flooring is a synthetic flooring product composed of several layers fused together through a lamination process. The core layer is typically made of high-density fiberboard (HDF), which provides strength and moisture resistance. This is topped with a photographic applique layer that mimics the appearance of wood, stone, or other natural materials. The topmost layer is a clear protective coating that guards against scratches, wear, and fading.
One of the primary reasons laminate flooring is favored by many is its ability to replicate the look and feel of natural flooring materials like hardwood and stone, but at a fraction of the cost. This makes it an ideal solution for those who desire the elegance of such materials without the high expense and maintenance requirements. Furthermore, laminate flooring offers a wide range of styles, colors, and textures, allowing homeowners to customize their space to their exact preferences.
Another significant advantage of laminate flooring is its ease of installation. Unlike traditional hardwood, which often requires professional installation, laminate planks are designed to interlock with a click-together system that can be easily handled by DIY enthusiasts. This not only reduces installation costs but also makes it a quick and less disruptive home improvement project. Stittsville Flooring Inc. provides expert guidance and services to ensure that your laminate flooring is installed perfectly, enhancing the beauty and value of your home.
Laminate flooring is not only aesthetically pleasing but also an economically smart choice. Its cost-effectiveness is a significant advantage for homeowners who are renovating on a budget. Compared to hardwood, stone, or ceramic tiles, laminate offers a substantial reduction in expense without compromising on the look and feel of your flooring. Stittsville Flooring Inc. ensures that despite the lower cost, the quality and durability of your flooring are top-notch, providing a valuable investment that enhances the overall value of your home.
For busy households, maintenance is a crucial factor in choosing flooring. Laminate floors are renowned for their resistance to stains, spills, and scratches, making them ideal for homes with children or pets. The protective top layer ensures that your floors stay looking new with minimal maintenance. Regular sweeping and occasional mopping with a laminate-specific cleaner is all it takes to maintain the floor’s appearance. Stittsville Flooring Inc. offers a range of high-quality laminate options that are designed to withstand the rigors of daily life, ensuring long-lasting beauty and functionality.
In today’s environmentally conscious world, more homeowners are looking for sustainable options for their home improvements. Laminate flooring can be a more eco-friendly choice compared to other flooring materials. Many manufacturers now use recycled materials in the production of laminate flooring and ensure that it is produced in a way that has a lower impact on the environment. Furthermore, the longevity of laminate reduces the frequency of replacements, thereby lessening waste over time. Stittsville Flooring Inc. is committed to providing eco-friendly flooring solutions that help you maintain a sustainable home.
Another often overlooked aspect of flooring is its impact on indoor air quality and overall health. Laminate flooring is a great option for those who suffer from allergies as it does not trap dust and allergens like carpet can. Additionally, many laminate flooring options now come with antimicrobial properties that inhibit the growth of bacteria and mold. This makes laminate not only a beautiful and practical choice but also a healthy one. Stittsville Flooring Inc. prioritizes your health and safety by offering laminate flooring that contributes to a healthier indoor environment.
Laminate flooring has come a long way in terms of style and design. With advancements in imaging and manufacturing technologies, laminate can now mimic almost any material, from rustic hardwoods to luxurious marbles and even custom patterns. The variety of available finishes, from matte to glossy and textured, allows you to tailor your flooring to match your unique style and current home decor trends. Stittsville Flooring Inc. stays at the forefront of these trends, providing you with stylish options that make your home stand out.
Choosing the right flooring is not just about practicality and cost; it’s also about creating a space that reflects your personal style and enhances your living environment. With laminate flooring, you have the flexibility to achieve a high-end look without the high-end price tag. Whether you are renovating an old property or putting the finishing touches on a new build, the right flooring can significantly impact the overall look and feel of your home.
At Stittsville Flooring Inc., we understand the importance of finding the perfect flooring solution that meets not only your functional needs but also your aesthetic desires. Our extensive range of laminate flooring options ensures that every customer finds something that perfectly matches their home’s decor. Our team of experts is dedicated to guiding you through every step of the process, from selection to installation, making sure that your flooring choice is seamless and stress-free.
Moreover, our commitment to quality and customer satisfaction means that you can be confident in the durability and appearance of your flooring for years to come. We believe in providing value that lasts, ensuring that your investment in laminate flooring is one that you will be satisfied with long into the future.
If you are looking for a flooring option that offers versatility, durability, and style, look no further than laminate flooring from Stittsville Flooring Inc. We are here to help you enhance your home with flooring that fits your lifestyle and budget. For more information or to schedule a consultation, please reach out to us at admin@stittsvillefloors.com. Let us help you transform your space with beautiful, long-lasting, and affordable flooring solutions.

Your floors are the foundation of your home’s beauty and functionality, and proper maintenance is the key to ensuring they stand the test of time. At Stittsville Flooring Inc, we understand the importance of a well-maintained floor. In this blog, we’ll share essential flooring maintenance hacks to extend the lifespan of your floors. With our expert tips, you can keep your floors looking pristine for years to come!
Consistent cleaning is crucial for any flooring type. From hardwood to tile, debris, and dirt can scratch and damage the surface over time. Create a cleaning schedule and use appropriate methods for each type of flooring. Vacuum regularly and use a microfiber mop to avoid abrasive cleaning that may harm the finish.
Strategically placed area rugs and mats not only add a touch of style to your interiors but also protect high-traffic areas. They act as a barrier against dirt, moisture, and potential damage, helping preserve the beauty of your floors and reducing the need for extensive cleaning.
Excessive moisture is a common enemy of many flooring materials. Wipe away spills promptly and use moisture-absorbing mats in areas prone to water exposure, such as kitchens and bathrooms. For hardwood floors, consider using a humidifier to maintain a stable indoor humidity level.
Heavy furniture can leave unsightly scratches on your floors, especially on hardwood and vinyl. Attach furniture pads to the legs of chairs, tables, and sofas to prevent these scratches and scuffs. This simple hack goes a long way in preserving your floors’ integrity.
While regular DIY maintenance is essential, periodic professional maintenance is equally vital. Engage the services of experienced flooring experts like us at Stittsville Flooring for deep cleaning, refinishing, and repairs. Our team knows the best practices for each flooring type, ensuring your floors receive the care they deserve.
By following these essential flooring maintenance hacks, you can extend the lifespan of your floors and keep them looking immaculate. If you’re looking for professional flooring maintenance, repair, or installation services, contact Stittsville Flooring Inc today. From regular cleaning and using area rugs to protecting against moisture and scratches, these tips will preserve the beauty and functionality of your flooring. Let us help you safeguard and maintain the heart of your home.
Get in touch with us today
To learn more about what we do, please click here. To contact us, please click here or call us at (343) 545-7325.
Step into a world of timeless elegance and modern design as we explore the latest flooring trends of the year. Your home is a canvas for self-expression, and the flooring you choose can be a defining element that sets the tone for your entire space. At Stittsville Flooring Inc, we take pride in keeping up with the ever-evolving world of interior design. In this blog, we’re thrilled to present the hottest flooring trends that are making waves in Kanata, Centrepointe, Nepean, Carleton Place, Stittsville, Ottawa, and surrounding areas. Let’s embark on a journey of inspiration and discover the flooring options that will elevate your home to new heights of beauty and sophistication.
As homeowners become more environmentally conscious, sustainable flooring options have skyrocketed in popularity. Say goodbye to traditional hardwood and welcome eco-friendly materials like bamboo and cork. Bamboo flooring, in particular, is highly durable, aesthetically pleasing, and a renewable resource, making it a perfect fit for modern homes.
Vinyl plank flooring has come a long way and is now a top contender for those seeking a luxurious yet budget-friendly option. It convincingly mimics hardwood, stone, or tile, adding sophistication to any room. Easy to maintain and waterproof, vinyl plank flooring is perfect for busy households.
While chevron and herringbone patterns have been all the rage in recent years, 2023 is steering toward more intricate geometric patterns. Incorporate captivating designs like hexagons, diamonds, and Moroccan-inspired tiles to elevate the aesthetics of your interiors.
Dark hardwood floors have had their moment, but this year, lighter and blonde tones are taking center stage. Oak, maple, and ash in lighter shades can brighten up your space, creating an airy and inviting atmosphere.
Stay on-trend this year by choosing sustainable materials, luxurious vinyl plank, and terrazzo flooring, and experimenting with geometric patterns and light wood tones.
If you’re looking for professional flooring and tile installation services to bring these trends to life, contact us at Stittsville Flooring Inc. We are a Stittsville family-owned Flooring business specializing in Hardwood, Luxury Vinyl and Porcelain tiles. We do our best to ensure we carry a variety of beautifully unique flooring products imported from all over the world. We’re here to help you achieve your dream home with these exciting flooring options.
Get in touch with us today
To learn more about what we do, please click here. To contact us, please click here or call us at (343) 545-7325.
